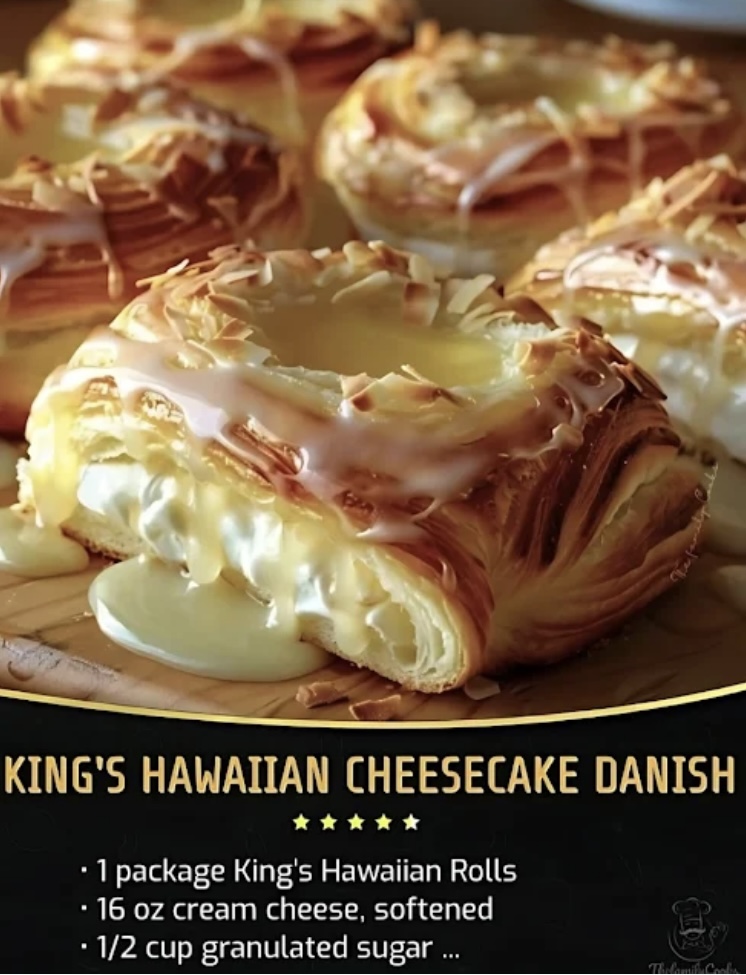
When it comes to breakfast or dessert treats that feel like pure indulgence, King’s Hawaiian Cheesecake Danish is a dream come true. Combining the buttery sweetness of King’s Hawaiian rolls with creamy cheesecake filling and a flaky pastry crust, this recipe delivers layers of flavor and texture that will leave you craving more. Perfect for brunch, parties, or whenever you need a touch of island-inspired decadence.
Let’s dive into how to create this irresistible Danish step by step!
King’s Hawaiian Cheesecake Danish: A Sunny Twist on Classic Comfort
This King’s Hawaiian Cheesecake Danish brings together tender dough, tangy cream cheese filling, and a hint of tropical sweetness for a treat so good, it might just steal the show. Whether enjoyed warm from the oven or packed up for later, these pastries promise pure bliss in every bite.
So grab your favorite roll dough and let’s bake up some sunshine!
Why You’ll Love This Recipe
- Buttery & Creamy : The perfect balance between rich King’s Hawaiian bread and smooth cheesecake.
- Quick Prep Time : Ready in under 45 minutes with simple steps.
- Customizable Toppings : Add fresh fruit, glazes, or nuts for extra flair.
- Impressive Yet Simple : Looks like it came straight from a bakery but requires no advanced skills.
Ingredients (Makes 8–10 Danishes)
For the Dough:
- 1 package refrigerated King’s Hawaiian roll dough (or homemade sweet dough)
- Optional: 1 sheet frozen puff pastry (thawed), for added flakiness
For the Cheesecake Filling:
- 8 oz cream cheese, softened
- ¼ cup granulated sugar
- 1 large egg, lightly beaten
- 1 tsp vanilla extract
- Pinch of salt
For Assembly:
- 1 egg, beaten (for egg wash)
- Optional toppings: Shredded coconut, turbinado sugar, or sliced strawberries
Instructions
Step 1: Preheat the Oven
Preheat your oven to 375°F (190°C). Line a baking sheet with parchment paper or lightly grease it.
Step 2: Prepare the Cheesecake Filling
- In a mixing bowl, beat the softened cream cheese and sugar until light and fluffy.
- Stir in the egg, vanilla extract, and pinch of salt until fully combined. Set aside.
Pro Tip : If using puff pastry, roll it out thinly and cut into squares for wrapping.
Step 3: Assemble the Danishes
- Roll out the King’s Hawaiian roll dough (or use pre-cut circles if refrigerated).
- Place a spoonful of cheesecake filling in the center of each dough piece.
- Fold the edges of the dough over the filling to form a pocket, pressing gently to seal. Alternatively, wrap puff pastry around the filling for extra crispiness.
- Arrange the assembled danishes on the prepared baking sheet, leaving space between each one.
Step 4: Brush with Egg Wash
Use a pastry brush to coat the tops of the danishes with beaten egg. This ensures a golden, glossy finish.
Step 5: Bake Until Golden
Bake in the preheated oven for 18–22 minutes, or until the danishes are puffed and golden brown.
Step 6: Cool & Top
Let the danishes cool slightly before serving. Sprinkle with optional toppings like shredded coconut, turbinado sugar, or fresh fruit slices for added charm.
Tips for Success
- Don’t Overfill : Too much filling can cause the danishes to burst open during baking.
- Chill Before Wrapping : Refrigerate the dough briefly if it becomes too soft to handle.
- Add Extra Zest : Mix lemon zest into the cheesecake filling for brightness.
- Make It Gluten-Free : Use gluten-free roll dough and ensure all ingredients are certified safe.
Serving Suggestions
These King’s Hawaiian Cheesecake Danishes pair beautifully with:
- Morning Coffee : Enjoy alongside your favorite brew for a sweet start to the day.
- Brunch Platter : Serve as part of a spread featuring quiches, muffins, or fruit salad.
- Dessert Table Star : Display them proudly at gatherings for a playful twist on tradition.
- Lunchbox Treats : Wrap individually and pack for work or school.
Final Thoughts
The King’s Hawaiian Cheesecake Danish proves that sometimes the simplest combinations yield the most unforgettable results. With its buttery dough, tangy-sweet filling, and customizable toppings, this pastry offers pure comfort wrapped in elegance. Whether enjoyed casually at home or shared with friends, it’s sure to become a go-to favorite.
So gather your ingredients, fire up the oven, and prepare for pure danish-loving bliss! Let us know how yours turns out—or share your own twist—by leaving a comment below. Happy baking—and happy eating!
